Expert Advice for Underfloor Heating Installation
Once you have purchased your underfloor heating system from us, the next step is installation. Below we have laid out everything you should need to help you install and set up your system.
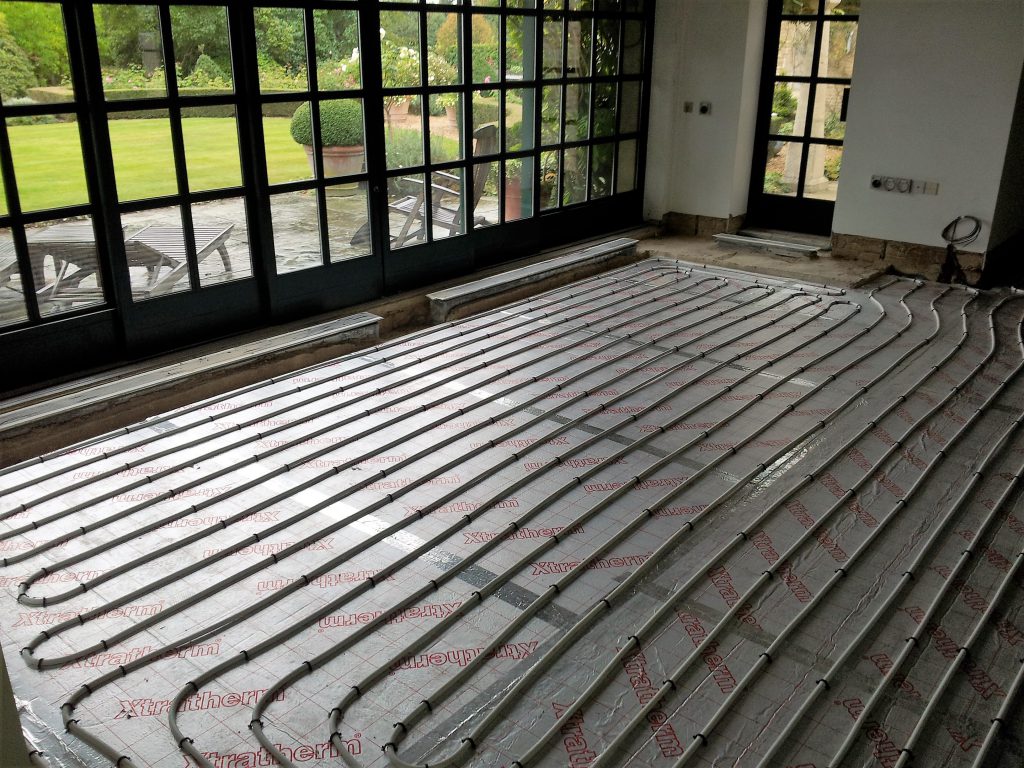
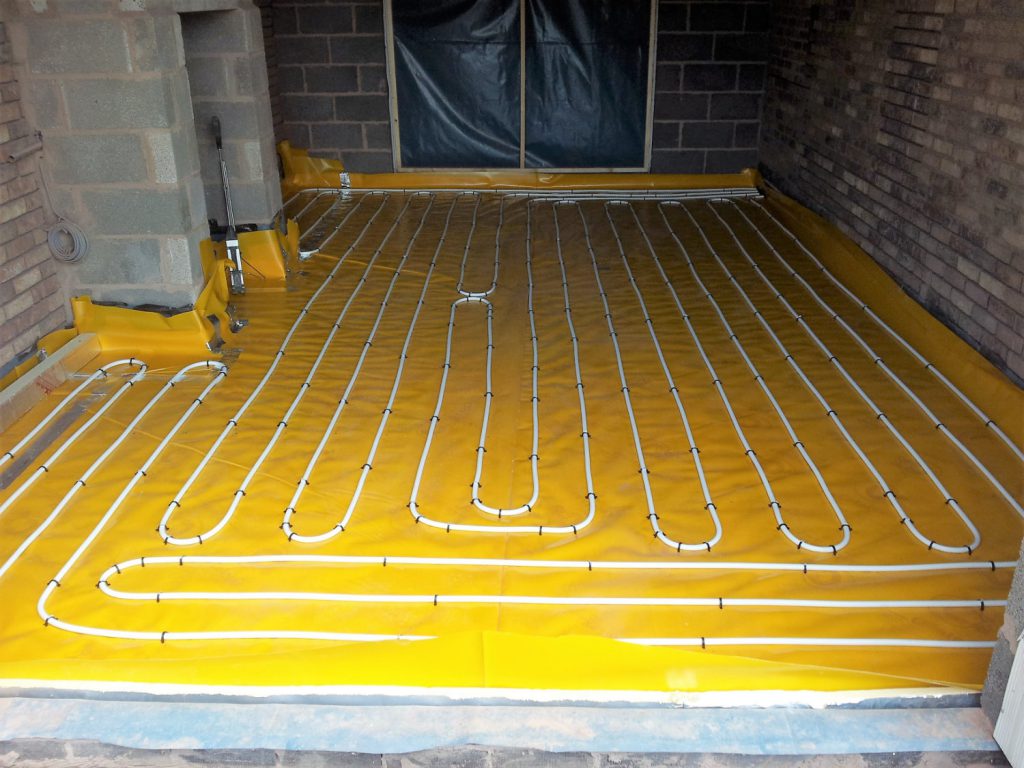
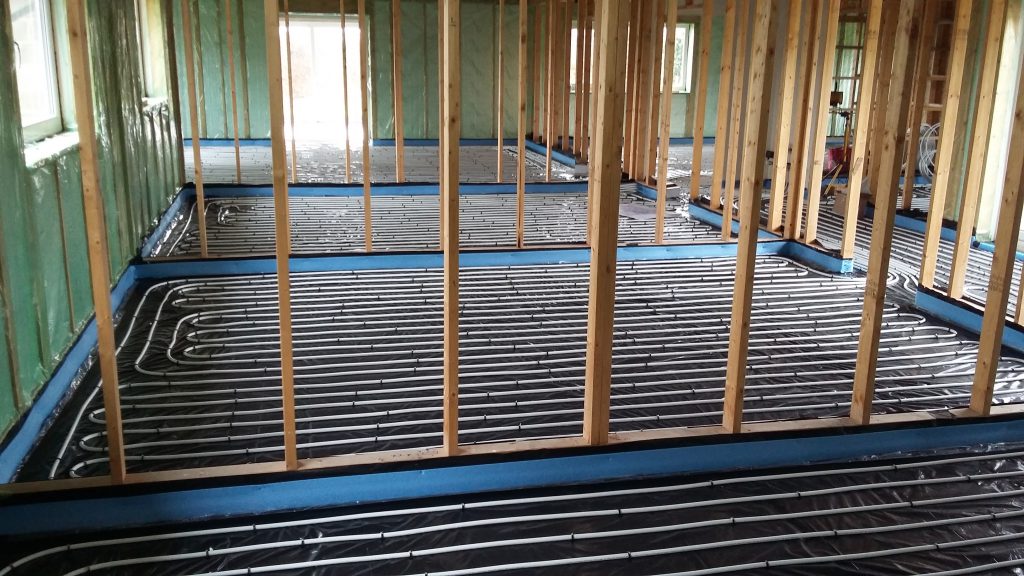
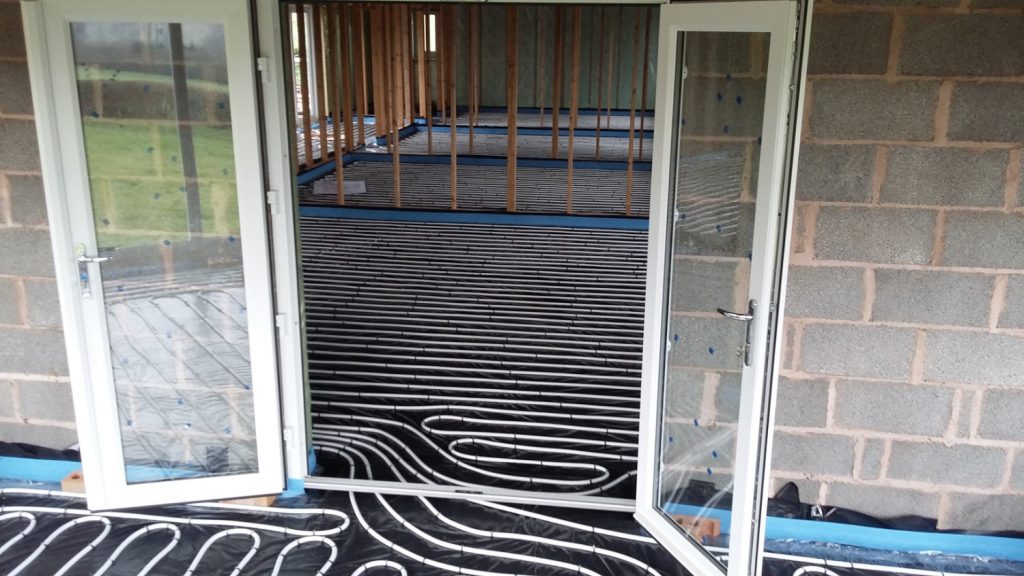
- Pipe distance for a concrete floor is c/c 200mm and for timber suspended floors c/c 200mm. We also recommend c/c 200mm for concrete floors if using a Heat Pump, unless the Heat Pump can only provide 35 degree Celsius water flow temperature then a pipe distance of c/c 150 mm should be applied.
- The pipe should be 100mm from the walls. Always go with flow to the cold spots first. See hand sketch for typical layout.
- Maximum loop length should be 110m. We recommend two people fitting the pipe; one to hold the coil and another to clip the pipe into its insulation.
- Fix the pipe to the insulation with the clips provided. You need approximately 1 or 2 clips per metre of pipe.
- The manifold, wiring centre and control pack should always be located centrally within the building.
- Try to use all the pipework supplied. You will usually have waste. The pipe is marked every metre so you know when it is time to go back to the manifold. The loop lengths on the Cad are approximate lengths only.
- Piping isn’t generally laid under Kitchen units or Utility units.
- We recommend that you first install the manifold and the control pack as per instructions provided. To fit the pipe to the manifold, cut the pipe end squarely using the plastic pipe cutter. Re-round the pipe end with the calibration tool provided, place the nut over the pipe, then the olive and finally push the insert into the pipe and attach to the manifold. The manifold is normally fitted 1m above floor level.
- If the pipe is kinked when bending, it should be straightened and rearranged so that the location of the kink sits on a straight length.
- Note the lengths of pipe fitted to each circuit, piping is marked every metre.
- Note also the room to which each circuit applies.
- Prevent people from walking over the pipes and keep tools etc away from the pipes.
- Fill the system as per instructions provided. Do not fill from the boiler filling loop. The system should be filled with water before the screed is laid.
- It is important to purge the pipework from the boiler to the manifold, to avoid air and dirt being introduced into the system.
- Screed or chipboard flooring should be laid immediately after the pipe is laid in order to protect it.
- Hardwood timber flooring must be conditioned before it is fixed in place.
- Balance the loops as suggested in the instructions.
- Note that the Room Thermostats are 3 core + earth. If you have individual controls you will have a wiring centre, position this just above the manifold.
- The actuators are fitted on the return manifold. The actuators take 4 minutes to open after room thermostat calls.
Watch our installation guide video below:
As part of your underfloor heating system, we have supplied you with Heatmiser PRT digital room thermostats. When the system is running, make sure that the room thermostats are set at 20°c, the system is designed to work at 20 to 21°c – which is an appropriate indoor temperature for the UK. The pump speed should be set to speed 3. The mixing valve is normally set to 45°c for concrete floors and 55°c for timber suspended floors. If for some reason the rooms aren’t heating up, the flow temperature on the mixing valve can be increased.
If the system is making any noise, then it is possible that air is in the system. The air can be removed from the end caps on the manifolds, similar to a radiator system. Make sure that the system is operated for 24 hours before making any adjustments.
Note, the system should operate 24 hours a day during the heating season, this is the most efficient way to run it. The Heatmiser PRT thermostat comes with set-back, so you can set the room thermostats to drop 5°c at night for example and in the morning the system can respond quickly to return to the required daytime temperature, see instructions provided for the Heatmiser PRT.
Room thermostats are normally fitted 1.5 m from the floor, located near to the light switch. Try to avoid positioning them in direct sunlight as it will affect their readings.
The maximum heat output for a underfloor heating system is 100 W/m2 for concrete floors and 70 W/m2for timber suspended floors. For any underfloor heating system to work efficiently, the property needs to be built to current building regulations. Carpet and underlay together should not exceed 2.5 Tog.
If you are using the underfloor heating for a Conservatory, note that it will extend the time you can use the Conservatory for. It will not keep it at 20°c all year as the heat losses are higher than 100 W/sqm in a Conservatory. This is also generally the case where radiators have been fitted.
Condensing boilers are very efficient used in conjunction with underfloor heating. For combination boilers, it is always recommended to check with the boiler manufacturer whether it can be fitted with a secondary pump.
If the project is a small flat and the combi boiler is only providing underfloor heating and hot water, it is possible to install the system minus the control unit, provided there is a safety device fitted to the boiler to prevent flow temperature getting adjusted above 60°c.
Underfloor heating systems can be mixed with conventional radiator systems. Also note that the underfloor heating system needs to be a complete separate system , ie the flow and return for the underfloor heating needs to go all the way back to the boiler. If you do have radiators in your system, we recommend independent control from the boiler, ie not together with the underfloor heating.
If you are using a heat pump, please make sure that the heat pump company specify a pump that can cope with the underfloor heating duty as you might not need our control packs with heat pumps. Heat pumps should be supplied with a buffer tank (ask your GSHP supplier).
We recommend a minimum of 50mm of Polyurethane insulation for the underfloor heating system. This is very high quality insulation and can be used for both concrete and timber suspended floor constructions.
Note we do not supply the insulation. Any builders’ merchant will have Celotex or Kingspan insulation in stock. The quote is based on clipping the pipe direct to the insulation board. We do supply pipe clips. With concrete floors, we recommend 65mm – 75mm of screed on top of the insulation.
Also 50 mm liquid screed or fibre screed can be used. It is important to fit a plastic membrane on top of the insulation if liquid screed is used. Edging strip must also be used if liquid screed is applied.
The screed must be allowed to dry for a minimum of 4 to 6 weeks before the heating is operated. The first time a system is used, the mixing valve should be set to minimum in order that any moisture in the screed drys out. Following this, the temperature should be increased by two degrees every day until the mixing valve is set at 45°C. Floorboards must have moisture content lower than 7% before they are installed. We do not recommend floorboards thicker than 25mm, see our technical page for more information about floorboards. Always check with the manufacturers of any floor finish that it is compatible with underfloor heating. It is important that no floor finish is laid on the concrete until it is 100% dry.
For stone and ceramic tiles, flexible adhesives and grout are recommended. Avoid carpet underlays of the felt and rubber crumb type. With Vinyl, check with the manufacturer that it works with underfloor heating and laminate flooring should always have an expansion gap, to allow for movement.
As WCs and Bathrooms are generally small areas, extra heat might be needed. Therefore it is standard practice combine towel rails with the underfloor heating in these areas.
If there are metal parts in the system, it should be flushed with Fernox or a similar product. For an average size UK property (4 bed house), 22mm flow and return to the manifold is suitable, larger properties should use 28mm flow and return. We highly recommend that the plumber installs isolating valves before the the pipework is connected to the manifold from the boiler, in case the pump needs servicing or the mixing valve needs cleaning out.
Before the screed is laid the system must be filled with water and fully vented of air. This can be best achieved using mains pressure through the two filling valves at the end of the manifolds. All valves should be closed and the flow filling valve connected with a hose to the mains water supply, with the return filling valve connected to a hose leading to a waste water point.
One by one, the flow and the return valves are opened and closed, purging the loops of air. Ensure that all the black caps on the return manifold are closed. Open the upper ring on the end cap 2 to 3 turns. Open the first black cap and then open the return end cap. Wait until clear water is coming out and make sure that all the air is gone. Close the black cap and do same for the next loop. Continue the process until all the loops are fully vented of all the air. Close the end caps when done.
When this is completed and the filling valves closed off, the pumps should be run for five minutes and the air vented again at the air bleed valve on the filling valves until all air is bled from the system. Do not fill the system from the boiler filling loop.
The system should be pressure tested with 5 bar pressure for 24 hours prior to laying the screed.
The manifolds are supplied with options for individual control for each room. On the return manifold (the black caps), actuators can be mounted for individual control. If a programmable room thermostat with a two port valve is controlling the system and there is no individual control, the “black caps” should be left open. The flow manifolds are supplied with flow gauges. To adjust the flow gauges, us the key provided with the manifolds. See instructions included in the manifold box on how to adjust the flow meters.
The following is an approximate guide to how far each loop should be adjusted;
Size of Loop Percentage Open
10 – 30 metres 30 % open
40 – 60 metres 50 % open
60 – 90 metres 75 % open
90 – 100 metres 100 % open
If the return manifold is not heating up, there is either air in the system or the flow and return from the boiler is incorrectly fitted. Run the pump on speed 3. The system must be on for 24 hours to confirm that all the loops are working. Also, check that the correct room thermostat controls the correct actuator.
Summary
The points below summarise all the information to bear in mind;
1) Screed or chipboard flooring should be laid immediately after pipelaying to protect the pipe.
2) Concrete screed floors must be cured before any heat is applied, a general rule of thumb is to allow 1 day per 2 millimetres of screed.
3) Timber floor with drymix infill can have heat applied immediately, the drymix must be dried completely before laying the flooring.
4) Hardwood timber flooring must be ‘conditioned’ before fixing.
5) It is important to purge the pipework from the boiler to the manifold, to avoid air being introduced into the underfloor heating system.
6) Fit actuators to valves after connecting the control wiring.
7) The actuators are fitted on the return manifold.
8) It is important that the actuators are screwed tightly on to the valve.
9) Initially start the system with the thermostatic valve set at min (25°c).
10) Increase the setting by 2°c per day, up to a maximum of 50°c for concrete floors, max 60°c for timber floors.
11) The flow & return from the boiler should be connected to the manifold connections shown using compression couplings.
12) NOTE. When first starting up the system it may take 12-24 hours for the heating effect to become apparent!
Note, if there is a risk for the air temperature dropping below freezing, then you must protect the pipes and manifolds from freezing conditions. It is always recommended to lay screed on top of the pipes as soon as they have been pressure tested.